The second part of Alex's Gap Shooting. This week we look at manipulating your gap so you are ready for when we are allowed back to shooting!
Gap shooting is a very accurate and reliable method of aiming without a sight, but it can be a challenging method to adapt to and can require lots of trial and error before you find what works best for you. In this article, I will discuss some methods you can use to manipulate your gaps and point on distance to better suit your style or the round you are shooting.   Â
Last summer at Wye Valley, gap shooting the 3Ds with my English longbow. Picture: Beth Duthie
The anchor point is normally my first port of call when I think about changing my gap. Let's say you are shooting at 18m; If you are shooting split finger under the chin, your gaps are going to be much larger than if shooting 3-fingers under, anchoring at the corner of their mouth. However, your point on distance is going to be a lot further away.
You can chose an anchor point or ‘facewalk' to manipulate your gaps and point on distance. Experiment with this in practice and find one that suits you (but not during a scored round!).
Generally, the higher you anchor, the closer your point on distance and the smaller your gaps. As mentioned above, shooting 3-fingers under is also going to make your gaps smaller than shooting Â"Mediterranean” or split-finger.
Have a think about what round you are shooting. It is personal preference but can be useful to have a point of aim on or as close to the target at the distance you are shooting. If shooting a variable distance round like field, experiment but aim for a point on distance that is ¾ or more of your max distance as it is generally easier and more forgiving to gap below the target than to aim above it.
In these three pictures, I am aiming at the same target at the same distance but am using different anchor points. In each, I am sighting down the arrow and placing my arrow point on the centre of the target. As my anchor point changes, the angle of the arrow shifts, changing the size of the gap and extending the point on distance. Each step in the above example can add 10+meters to my point on distance.
Arrow length is another variable that you can manipulate to change your gaps.
A longer arrow will give a smaller gap. You can also reduce the size of your gaps by increasing arrow weight or by adding a longer fletching to slow it down. You can achieve this with inserts and point weight or by using a heavier/lighter weight shaft material (e.g. shafts made from pine are generally heavier than shaft made from spruce or POC).
For rounds like WA Field and Target, you can carry multiple sets of arrows. For my English longbow WA Field set up, I shoot a different arrow at <30m compared to what I shoot at 30-50m.
This can be a risky strategy as you can only shoot one set of arrows per target and if you judge the distance wrong and shoot the wrong arrow, you can lose a handful of points! It can also mean learning two sets of gaps and you are not allowed to refer to notes during a scored round!
If you have different arrows at your disposal, try them out and see what effect the different arrow configurations have and you will get closer to finding what works best for you.
These are the two sets I use for WA Field. Manipulating arrow length, mass and fletching size can have a huge impact on your gaps.
Perhaps most obvious of all is draw weight. There is a limit to how much we can manipulate our gaps as we are at the mercy of our draw weight, but you can still employ the above techniques and see dramatic changes within the limits of your draw weight.
As you expect, lowering draw weight will reduce gaps, but may produce less forgiving results at longer distances.
I am seeing more and more archers using different bows and different draw weights for different rounds to enable them to get achieve a set up that works for them.
However, you do not need to go out and buy a different bow for each distance you want to shoot! There are pros and cons to having big or small gaps, or a fast or slow arrow speed.
While reducing the size of gaps can make aiming more comfortable or give a desired point on distance, faster set ups have their advantages.
Some archers use fast set-ups as they find that their gaps may stay more consistent across a range of distances. For example, the gap from 15-25m will stay the same. This can be more forgiving if there are some errors with judging distance or with quality of shot execution. I have also found that faster arrows have helped me score more points at longer distance targets.
When considering draw weight as a variable, priority should always go to a draw weight that you can control and shoot without fear of injury.
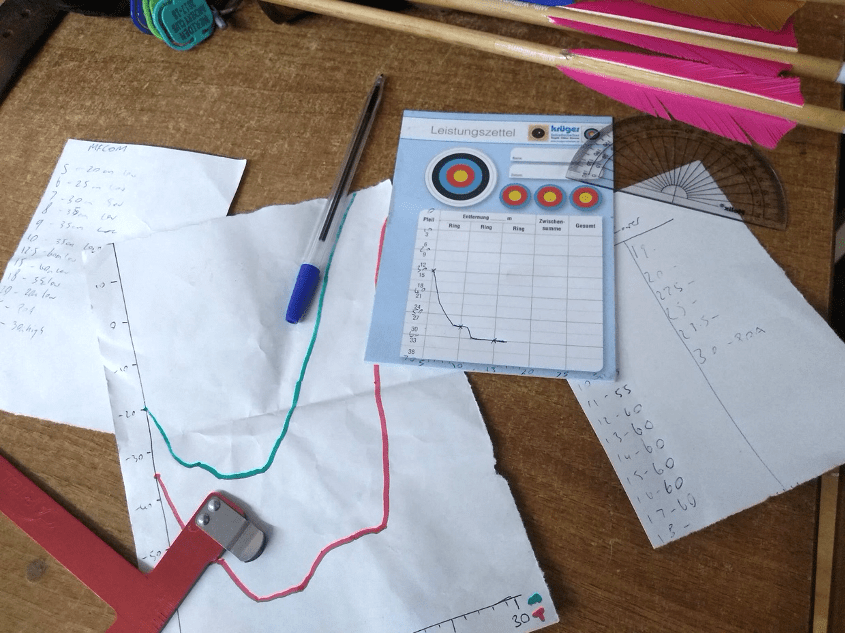
It can be helpful to know the measurements of your gap as it allows you to plot them on a graph and can help you visualise your gaps when shooting. Whichever direction you take, it is always good practice to keep notes so you can compare the effects of different arrows or anchor points.
WA 3D GB athlete, Emily Williams, plots her gaps to compare variations in anchor point and arrow configurations to find the most consistent results! (Picture: Milly Williams)
Experimenting with these variables has helped me manipulate my gaps and find a set-up that works for me! I hope that this can be useful for some of you, or at least make gap shooting seem less daunting! It can be as complicated or as simple as you need it to be, but with a little trial and error, you can make gap shooting work for you!
.jpg)